Do you go out in the winter mountains on foot, skis or snowshoes? If so, read on.
The Risks
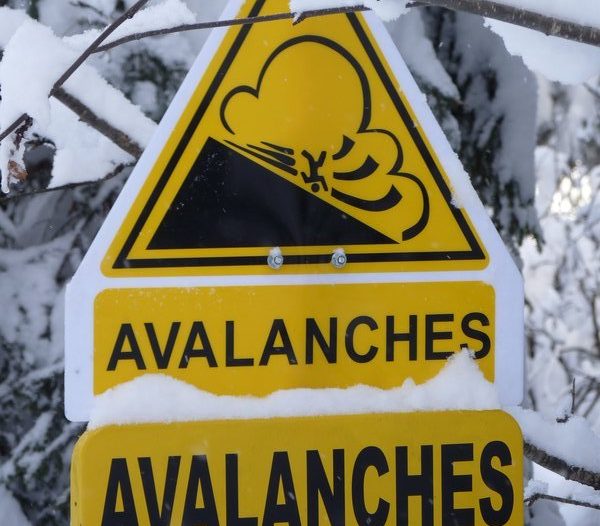
Avalanches don’t just happen to other people. The statistics compiled for France by the French National Avalanche Association (ANENA) give sobering reading.
2016 ? 2017: 114 people avalanched with 22 deaths.
2015 ? 2016: 107 people avalanched with 21 deaths.
2014 ? 2015: 134 people avalanched with 45 deaths.
2013 ? 2014: 101 people avalanched with 20 deaths.
Essential Avalanche Equipment
Should you go where there’s the slightest risk you need to carry the avalanche essentials. These are:
- An avalanche transceiver
- Avalanche probe
- Shovel.
Everyone in the group must have this equipment. Remember by the time professional rescue services arrive the ?golden? 15 minutes will have almost certainly passed. After 15 minutes the chances of survival go down rapidly.
You owe it to yourself and those with you to make sure that everyone is equipped. This equipment is, in my view, like the insurance you have for your car. You must have it but you hope never have to use it.
?All The Gear & No Idea?
Obviously you can have ?all the gear and no idea? so it’s essential to learn how to use your avalanche transceiver, probe and shovel. Importantly, even for the most experienced, it’s a good idea to practise at the start of the winter. Skills fade with time.
Remember if the worst happens you are going to be in a high stress situation. The more you practise the less your skills and reactions will be degraded by stress. It’s how the army prepare for battle. Remember using the transceiver is only one aspect of an avalanche rescue. Once the victim’s position is located on the surface you now need to confirm it precisely using a probe. Now the physically most demanding part starts, digging out the victim.
Before You Go Out
Transceiver Check
You should also check everyone’s transceiver at the start of each day (and after breaks) by carrying out a transceiver check. This check needs to be done properly so that both ?transmit? and ?receive? functions are verified. At the start of a trip doing a full range check is also recommended. This will give you a visual reminder of the range of each transceiver. It can also highlight any faults with a transceiver. Battery level should also be confirmed and new batteries installed if they are less than 70 ? 80%. Batteries run down much faster when the transceiver is in ?Search? (Receive) mode.
Transceiver Search
The search phase starts with the ?Signal Search?. This phase starts from the last point the victim(s) where all seen on the surface. This point should be clearly marked. From hear the form of the search depends on the number of searchers available and the size of the avalanche.
If it’s just you turn your transceiver to ?Search? mode and cover the full width of the avalanche in a zig-zag pattern. Each zig-zag should be no more than 40m (depending on the transceiver) from the one above to ensure the whole avalanche path is covered. Don’t forget that the edge of the avalanche can push under the sides and the end (or tip) of the avalanche. During this stage look around you rather than at the transceiver. You may find pieces of equipment on the surface or even see a hand or leg sticking out!
The moment a signal is picked up and is stable the next phase of the search starts. The ?Coarse Search?. Follow the indicators on your transceiver and watch the numbers decrease. This phase can be carried out rapidly. When the numbers drop to 10 slow down and bring the transceiver down so that it’s skimming above the snow (or at a constant height above the avalanche debris). When the direction arrows disappear and only a number remains the next phase starts ? the ?Pin Point? or ?Fine Search?.
Now is the time for accuracy. Slow right down. Keep your transceiver always pointing in the same direction (otherwise you will get confusing results). Keep moving forward watching the numbers descend until they start increasing again. Now, without being sudden, move the transceiver back until you’ve got the lowest number. Now go at right angles to your previous direction and watch the numbers. If they go up go back and in the opposite direction until once again the numbers start increasing. This criss-cross pattern ends with you finding the point with the lowest possible number. Mark this spot with a pole or other item that won’t move. Now s the time to move on to the next phase of the rescue ? probing.? Watch a video of a candidate on an International Mountain Leader training course.
Probing
The avalanche probe should be at least 2m 40cm long. Statistically most victims are buried between 50cm and 1m 50cm so you need a reasonably long probe. A good probe will be joined by a metal cable rather than rope as it doesn’t stretch. A probe that comes apart when it’s withdrawn may jam or break.
Probing itself needs to be done correctly and systematically. Avalanche training courses that don’t bury a transceiver at least 1m down are giving you a completely false sense of security.
Start probing from the point identified in the ?fine? search with the transceiver. You then spiral out with a distance of no more than 20cm between each ?probe?. Think of a ?Swiss roll?. This should ensure that you don’t miss the victim. The probe should be inserted perpendicular (i.e. 90 degrees) to the slope and NOT vertically downwards. Use one hand to guide the probe and the other to push it in. Use gloves so that the probe doesn’t warm up and then freeze up. When you ?strike? the victim you will feel a ?bounce? rather than a hard strike when you hit the ground.
When you are sure that you’ve probed the victim leave the probe in place. It’s your point of reference for the next phase ? digging out the victim.
Digging
To be efficient and therefore quick you need to be organised. Your probe will tell you how deep the victim is buried. If there’s more than one of you digging one person starts digging down the pole. The second (and third, etc) start 2 shovel lengths down the slope (this avoids getting hit by each other’s shovel)! The aim is to create a descending horizontal platform. When the platform has reached the level of the victim you will have a ?flat? place to carry out first aid. Remember your ABC ? Airway, Breathing, Circulation. An avalanche victim may well have an obstructed airway so check this first.
Where to get Avalanche Rescue Training
If you are looking to learn how to use an avalanche transceiver and develop your avalanche search and rescue skills I run half-day courses in Meribel and Courchevel during the winter.
What is biggest big of Avalanche Advice?
In a word: ?Avoidance?. By making good decisions on where, when and how you go ?
Choosing a route and terrain that have virtually no risk of avalanching or being swept by an avalanche from slopes above. Indeed when I snowshoe around the ski resorts of Courchevel and Meribel I use routes that have no avalanche risk except in exceptional circumstances. In such circumstances I would go elsewhere or even not go out.